Make Soft and Chewy Mochi Waffles with My Easy Recipe
I want you to taste that crisp edge and the stretchy, pillowy center—mochi waffles do both in one bite, and they’re faster than you think.
In my kitchen, I use one bowl, mochiko flour, a splash of whole milk, and a simple batter that comes together in minutes. A Belgian iron needs about four minutes per portion; a regular iron runs closer to three, and the golden ridges tell you when they’re done.
You’ll learn why sweet rice flour gives that springy chew, how a bit of all-purpose flour and baking powder keep things light, and which cues—color, aroma, easy release—signal perfect doneness. I’ll walk you through portioning, heat settings on your waffle iron, and quick storage tips so you can make these for busy mornings without losing texture.
Key Takeaways
- Use mochiko (sweet rice flour) plus a touch of all-purpose flour for chew and lift.
- One bowl mixes everything: eggs, milk, sugar, and dry ingredients for easy prep.
- Adjust iron heat—Belgian ~4 minutes, regular ~3 minutes; look for golden ridges.
- Cooked pieces keep 4 days refrigerated or freeze for up to 10 days; reheat in a toaster or oven.
- Portion carefully to avoid overflow; visual cues beat exact timing every time.
Your Shortcut to Crispy-Outside, Chewy-Inside Waffles
Let me show you how to lock in a golden crust while keeping the inside soft and slightly stretchy. I keep this practical so you can get great results without fuss.
First, preheat the waffle iron fully so the batter hits the hot plates and begins to crisp. A hot start helps form rich, golden brown ridges without drying the center.
Watch for the steam to slow and for the grid color to deepen. When the waffle lifts easily and the center feels set but springy, it’s done. I often crack the iron a hair near the end to peek.
- Belgian waffle makers: plan about 4 minutes; classic irons: ~3 minutes.
- Set the heat to medium or medium-high to avoid scorching while the center finishes.
- Keep batter pourable, not runny—add a splash of milk or a teaspoon of flour to adjust.
- Different makers behave differently; tweak one variable after your first cook.
| Iron Type | Cook Minutes | Ideal Heat | Key Cue |
|---|---|---|---|
| Belgian maker | About 4 minutes | Medium-high | Steam slows, deep ridges, springy center |
| Classic iron | About 3 minutes | Medium | Even golden brown, easy release, set center |
| Any rice flour batter | Vary by maker | Adjust to balance | Tender, slightly stretchy center |
What You’ll Need for Mochi Waffles: Ingredients That Guarantee Texture
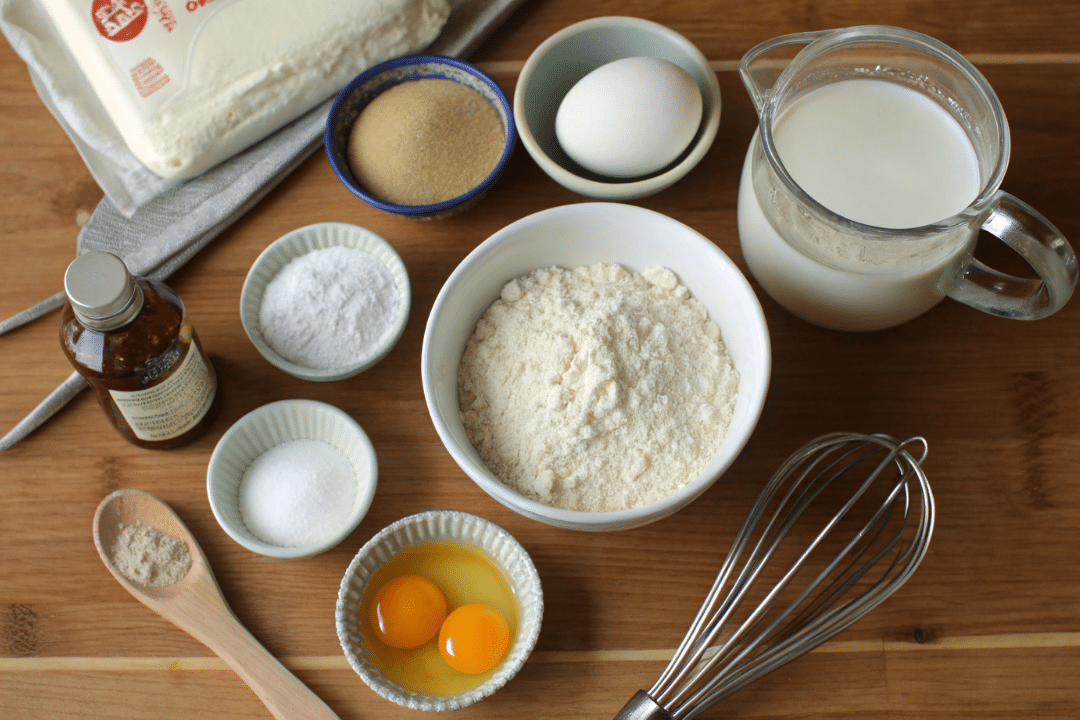
Great texture begins in the pantry—choose ingredients that promise chew, lift, and crunchy edges. I explain each choice so you know how it shapes the final bite.
Mochiko Sweet Rice Flour vs. Regular Rice Flour
Mochiko sweet rice is finely milled from short-grain rice. Its starches gel and give that stretchy chew prized in Japanese treats. Regular rice flour tends to be drier and less elastic, so the batter can feel crumbly unless you add more milk.
The Supporting Cast
- All-purpose flour: adds a tender crumb and light lift.
- Baking powder: a small rise for airy pockets in the grid.
- Cornstarch: helps the edges brown and crisp.
- Salt: brightens flavors and rounds out sweetness.
Rich Liquids and Flavor
Whole milk gives the body, so the rice flour stays dense without thinning. One egg builds structure and a lightly crisp exterior. A splash of vanilla extract and a touch of sugar add aroma and taste.
Swaps and Gluten-Free Notes
For gluten-free, keep the mochiko and replace all-purpose with a 1:1 GF blend. Whisk together the dry ingredients in a mixing bowl, then add milk, vanilla, and the egg. Let the batter rest five minutes so starches hydrate before you heat the iron.
| Ingredient | Why it matters | Swap tip |
|---|---|---|
| mochiko flour | Gives chew and stretch | Regular rice flour—add a little extra milk |
| all-purpose flour | Lightens crumb | 1:1 GF blend for gluten-free |
| cornstarch | Promotes crisp edges | Arrowroot works in the same amount |
Step-by-Step: From Mixing Bowl to Golden Brown Waffle
A hot iron and a well-mixed batter are the two things that make every batch turn out golden and chewy. I walk you through quick, exact steps so you get the cue-based results I look for in my kitchen.
Preheat and Prep
First, preheat the waffle iron fully—this is the single best tip. Preheat the waffle iron until it reaches its regular cooking temperature so the first contact crisps the exterior fast.
Lightly oil the plates or spray with cooking spray to prevent sticking. Keep a towel nearby to wipe any stray drips between batches.
Mix Dry Ingredients
In a mixing bowl, whisk together the flour, mochiko, salt, sugar, baking powder, and cornstarch until the mixture is uniform. Even distribution of powder and salt = consistent lift and crisp edges.
Finish the Batter
Add milk and vanilla, then whisk smooth. Add the egg last, and whisk until the batter ribbons off the whisk. If it’s too thick, add a splash more milk; if too thin, a teaspoon of flour tightens it.
- Portion the grid so that it is about three-quarters full—this avoids overflow while filling the corners.
- Start with the recommended cook time: Belgian waffle, ~4 minutes; classic iron, check at ~3 minutes.
- Use time as a guide. Look for deep, golden-brown ridges, reduced steam, and an easy release. The center should feel set and springy.
| Iron Type | Cook Minutes | Key Cue |
|---|---|---|
| Belgian waffle | About 4 minutes | Deep golden ridges, springy center |
| Classic iron | About 3 minutes | Even color, easy release |
| Any iron | Vary by machine | Reduced steam, set center |
Waffle Iron Choices and Pro Technique Tips
Pick the iron that matches your morning: deep pockets give plush chew, shallow grids give quick crisp. I’ll walk through what I use and why, so you waste less batter and get better results fast.
How Each Maker Shapes Texture
Belgian irons build deep pockets and typically require about 4 minutes to cook a Belgian waffle. Classic irons cook faster and make thinner, crisper pieces. Bubble makers create a lot of crisp surface area while maintaining a soft center.
Consistency, Heat, and Quick Upgrades
- Keep the batter at the thickness of heavy cream; it holds its shape and gels from rice flour without running.
- Portion to three-quarters full and close the lid gently to avoid overflow.
- Preheat the waffle iron thoroughly, and re-grease it lightly between batches with cooking spray or a small amount of oil.
- If your iron runs hot, shave 30–45 seconds off your first try and watch for golden brown ridges and a set center.
- A small amount of baking powder helps lift; too much powder makes the inside expand too quickly and stay underdone.
| Iron Type | Typical Cook Minutes | Texture |
|---|---|---|
| Belgian maker | About 4 minutes | Deep pockets, plush chew |
| Classic iron | About 3 minutes | Thin, crisp edges |
| Bubble waffle maker | Varies—watch closely | Extra crisp surface, tender center |
Toppings, Mix-Ins, and Flavor Twists That Shine
Bright toppings make every bite feel like a small celebration—here are ideas that strike the perfect balance between texture and flavor. I keep these simple so your morning stays easy and your plate looks special.
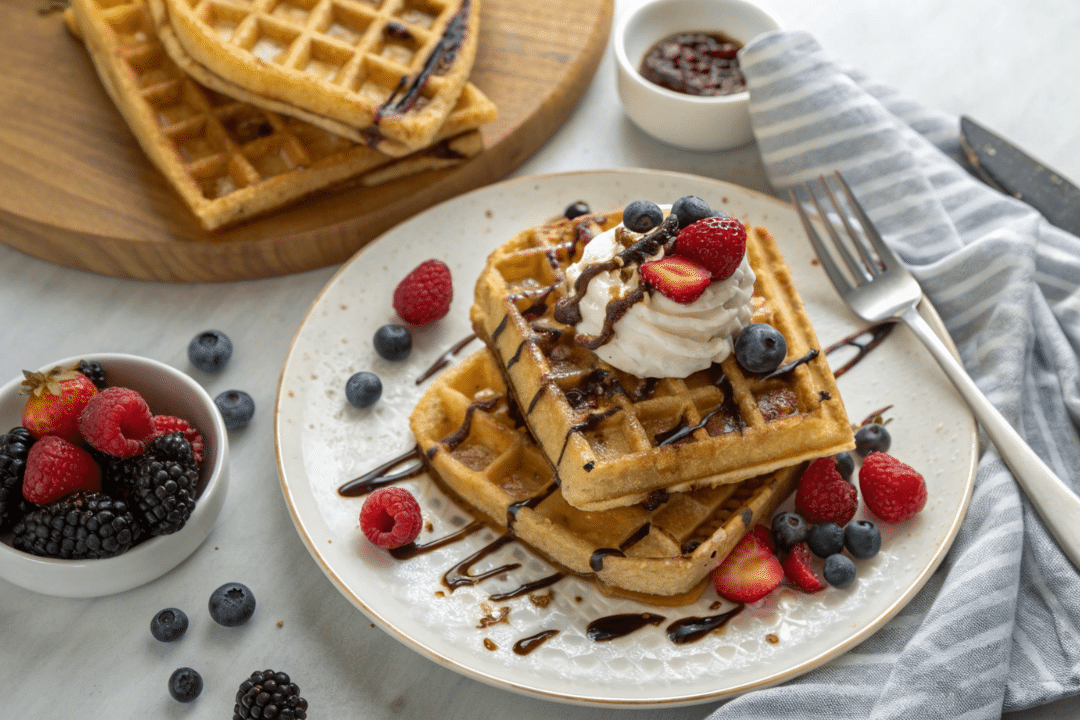
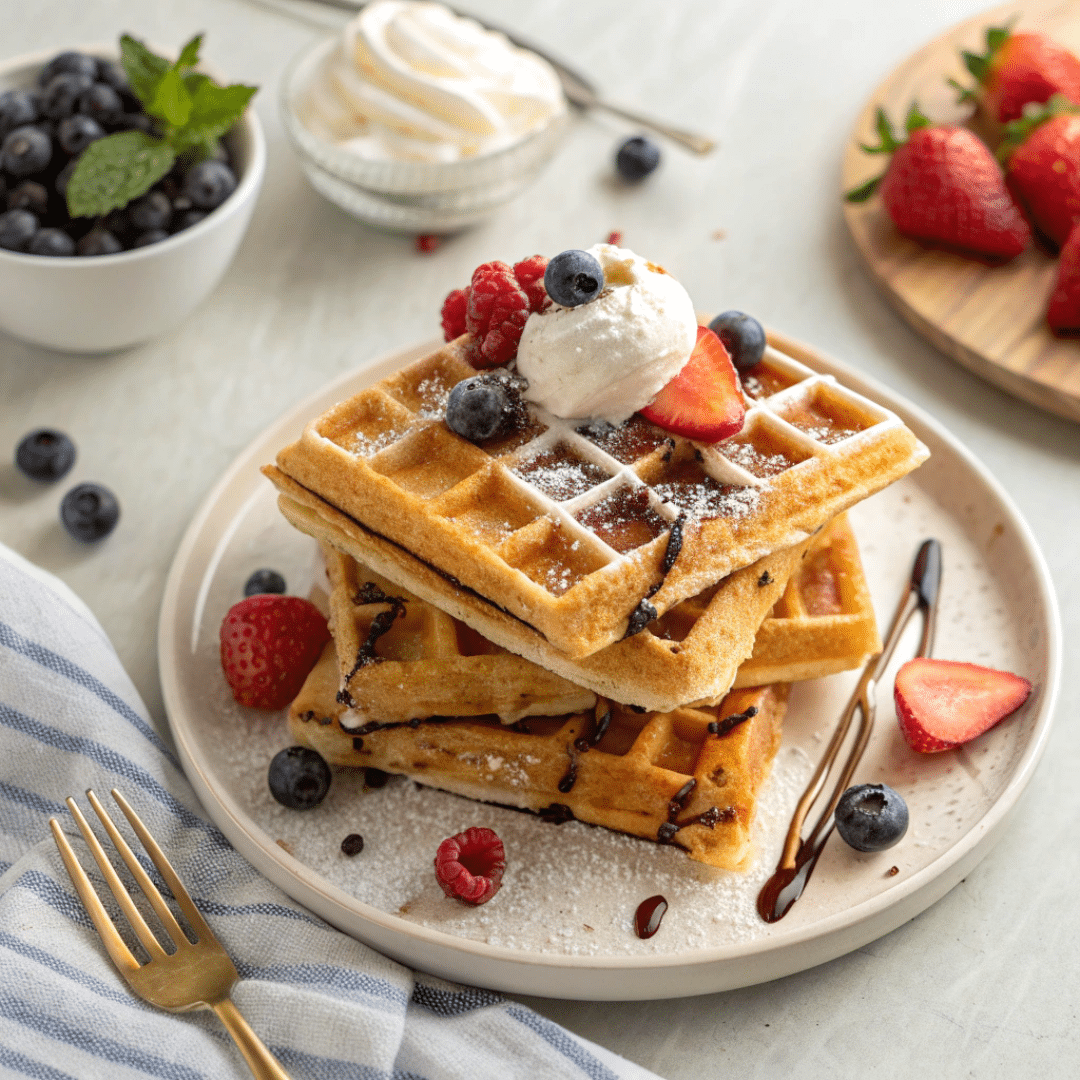
Fresh and Creamy Options
Pile ripe berries on a warm piece, add a soft cloud of cream, and dust with powdered sugar for contrast. A scoop of ice cream adds cool richness for a brunch-ready treat.
Pantry-Friendly Sweet Ideas
Fold a small handful of chocolate chips or coconut flakes into the batter sparingly so the grid closes cleanly. Spoon jam, ube, or pineapple spread on top for color and tang.
Savory Spins for Brunch
Top with crispy bacon and a pat of salted butter, then drizzle hot honey for a sweet-salty lift. These pair well with a tiny dash—just a teaspoon of vanilla—in sweeter sauces.
Inspired Variations
Make Bananas Foster by caramelizing butter and brown sugar, adding vanilla and a splash of rum, then reducing the mixture to a glossy sauce. Spoon it over a warm mochi waffle with ice cream for drama.
- I love fruit-and-cream moments—berries, cream, powdered sugar.
- Pantry picks: chocolate chips, coconut flakes, jam, ube or pineapple spread.
- Savory: bacon, salted butter, hot honey.
- Sundae: ice cream, powdered sugar, toasted nuts for crunch.
| Category | Examples | Quick Tip |
|---|---|---|
| Fresh & Creamy | Berries, whipped cream, ice cream | Serve cold cream on hot waffles for contrast |
| Pantry Sweets | Chocolate chips, coconut, jam, ube spread | Fold mix-ins sparingly into the batter to avoid sinking |
| Savory | Bacon, salted butter, hot honey | Use contrast—fatty bacon and bright honey |
| Inspired | Bananas foster, nian gao-style, sundaes | Caramel sauces boost aroma; try sweet rice textures for chew |
Make-Ahead, Storage, and Reheating Without Losing the Chew
Prep once and you’ll be grateful all week. I give specific timelines and simple steps so you can pull great results on autopilot during a busy morning.
I refrigerate uncooked batter in a covered bowl for up to 2 days. Stir briefly before cooking so starches redistribute and the batter pours smoothly. If it thickens, whisk in a spoon of milk; if it thins, a teaspoon of flour tightens it back up.
- Cooked waffles can be stored in an airtight bag in the fridge for 4 days or in the freezer for about 10 days. Cool completely before sealing to avoid steam-softening.
- Reheat in a toaster or a 350°F oven for a few minutes. Dry heat restores crisp edges while the mochi center stays pleasantly chewy—skip the microwave, it steams and dulls texture.
- For batch baking, double the recipe, cool on a rack, then freeze in a single layer with parchment between pieces. They reheat in minutes and keep well in stacks.
I portion batter into small containers by the cup or cups you need for the week. That way, you cook only what you want each morning. Hosting brunch? Bake ahead, then finish the last 3–5 minutes right before serving so every waffle hits the table hot and crisp.
| Item | Storage | Reheat |
|---|---|---|
| Uncooked batter (bowl) | Refrigerate up to 2 days | Stir, adjust with milk or flour |
| Cooked waffle | Fridge 4 days / Freezer ~10 days | Toaster or 350°F oven, a few minutes |
| Batch frozen | Single layer, then stack with parchment | Reheat from frozen in a toaster or oven |
Conclusion
You can get a bakery-style chew and crisp edges at home with a few simple steps.
Whisk the dry mix—mochiko sweet rice flour, a touch of baking powder, and salt—then add milk, vanilla extract, and an egg. Let the batter rest a few minutes so starches hydrate.
Cook in a hot waffle iron until rich golden brown—about 4 minutes for a Belgian waffle, roughly 3 minutes in a classic maker. Trust color and release over the clock.
Store batter in the fridge up to 2 days. Reheat cooked waffles in a toaster or oven to restore crisp edges while the center stays pleasantly bouncy. This recipe makes quick, repeatable breakfasts you’ll reach for again.
Mochi Waffles
Ingredients
Method
- Preheat fully to medium or medium-high depending on your waffle maker. Lightly oil or spray the plates to prevent sticking.
- In a bowl, whisk together mochiko flour, all-purpose flour, cornstarch, sugar, baking powder, and salt until evenly combined.
- Add milk and vanilla to dry ingredients, whisk smooth. Add the egg last, whisk until batter ribbons. Adjust with milk or flour to achieve a pourable but thick consistency.
- Belgian waffle maker: Cook ~4 minutes. Look for deep golden ridges and a springy center.
- Bubble or other irons: Adjust time; watch for reduced steam and set, springy center.
- Portion the batter to about three-quarters full of the grid. Check for even color and easy release before lifting.
- Add toppings immediately: fresh fruit, whipped cream, chocolate, or savory options like bacon and hot honey. For dessert, drizzle caramel or ice cream.
Notes
FAQ
What makes Mochiko sweet rice flour different from regular rice flour?
Can I use just regular rice flour or all-purpose flour instead?
How do I get a crispy outside and chewy inside?
What ratio of wet to dry ingredients works best?
Do I need baking powder or cornstarch?
Can I make a gluten-free version?
How long do cooked waffles keep, and how should I store them?
What’s the best way to reheat so they stay crisp and chewy?
Can I add mix-ins like chocolate chips or fruit?
Any pro tips for using different waffle makers?
How do I know when they’re done?
Can I make savory versions for brunch?
Any tips for batch cooking and meal prep?
About The Author
John
John Watson is the passionate food enthusiast behind MePlusFood.com. With a deep love for exploring culinary delights, he shares honest restaurant reviews, mouthwatering recipes, and culinary adventures. Join John on his flavorful journey to savor the world one bite at a time.