My Simple Tahini-Free Hummus Recipe for Delicious Dips
I love how a quick tahini-free hummus can turn chopped carrots and crackers into a party. The first spoonful should feel smooth, bright, and a little surprising — like a small kitchen win that smells of lemon and warm cumin.
I made this recipe because I wanted a creamy, bright dip that comes together in 5–10 minutes with a food processor. Using aquafaba from the can keeps the texture plush while cutting oil, and pureeing the chickpeas thoroughly before adding liquids makes the finish silky.
This version keeps the things I adore about traditional hummus — lemon lift, gentle garlic, and a balanced savory edge — without needing tahini. It’s cheaper than most store tubs, stretches across snacks and lunches, and adapts easily to roasted red pepper, avocado, or beet variations I love to riff on.
Key Takeaways
- This quick recipe yields a creamy, flavorful dip in under 10 minutes.
- Aquafaba replaces tahini to preserve texture with less oil.
- Puree chickpeas first for a smoother result.
- Homemade hummus is cheaper and more adaptable than store-bought.
- Simple spices and lemon balance the savory base.
Why I Skip Tahini (and Still Get Creamy, Flavor-Packed Hummus)
Skipping tahini started as a budget move and became my favorite tweak. Tahini is a sesame paste that adds nuttiness and heft, but it’s often pricey and missing from my pantry when cravings hit. So I experimented.
I use aquafaba and a careful blend to build body without extra fat. The liquid from the can gives silkiness while letting me cut oil. Blend the chickpeas well first, and the texture becomes surprisingly lush.
Flavor comes from layers. Fresh lemon brightens the base. Raw garlic gives backbone. A pinch of cumin and smoky paprika rounds each bite, so no one misses the sesame note.
- I skip tahini for cost and flexibility, yet keep a creamy texture.
- Aquafaba does the heavy lifting, so I use less oil and less fat.
- I’ve served this to friends who expect classic taste — they loved it.
- For sesame lovers, a sprinkle of toasted spices adds the nutty echo without changing the base.
Tahini-Free Hummus: Ingredients that Make it Work
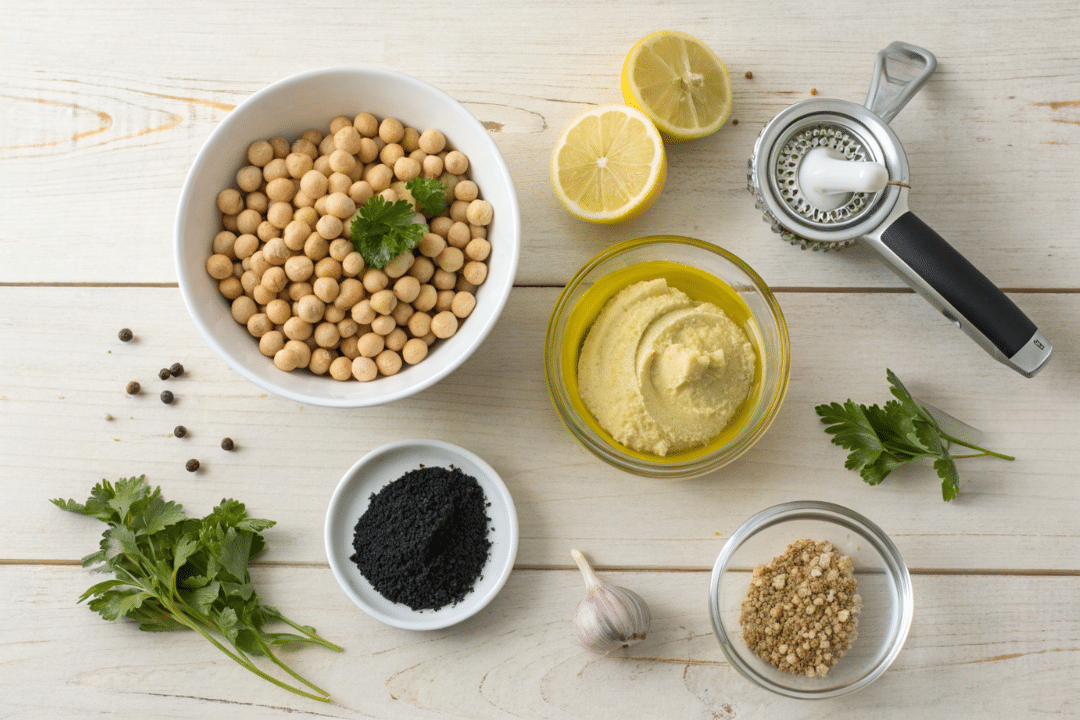
A tight roster of pantry staples can turn a can of chickpeas into a silky, bright dip in minutes. I lean on each ingredient to play a clear role, so the final spread feels complete.
Chickpeas (aka garbanzo beans) and Their Liquid: Your Secret to Creaminess
Canned chickpeas give consistent softness and that liquid gold—aquafaba. I reserve the can of liquid and add it slowly while blending. It emulsifies the beans and keeps the texture plush without too much oil.
Fresh Lemon Juice and Zest for Bright, Clean Flavor
Fresh lemon juice wakes up every bite. A little zest adds aroma. Bottled lemon can taste flat, so I squeeze fresh when I can.
Garlic: Raw for Bite, Roasted for Mellow Depth
Raw garlic gives a sharp, peppery snap. For a sweeter, rounder note, roast cloves until soft and caramelized. Both approaches work; choose by mood.
Extra-Virgin Olive Oil: When to Use It—and When to Skip It
Olive oil adds silk and savory roundness. With good aquafaba technique, I often use just a tablespoon or skip oil entirely to keep it lighter.
Seasonings that Matter: Kosher Salt, Cumin, Paprika, Sumac
Kosher salt seasons evenly. Cumin brings warm earthiness; paprika adds color and subtle sweetness. A sprinkle of sumac at the end gives a bright, tangy lift.
- I taste as I go, nudging acid, salt, and spice until the dip hums.
- If a can reads “garbanzo beans,” that’s the same as chickpeas—pick a brand you trust.
Tools, Prep, and Time: Set Up for Success
Setting up your station is the secret to silky results every single time. A little prep saves time and keeps the texture consistent.
Food Processor vs. Blender: Getting the Smoothest Texture
I reach for a food processor because it handles thick purees better. The processor turns chickpeas into a smooth paste quickly and cleanly.
If a blender is your only option, add liquids early so the blades catch the mix and don’t stall. Pulse first, then run continuously, scraping the bowl as needed.
Optional Chickpea-Skin Removal: When the Extra Step is Worth It
Peeling skins is optional. I do it when I want ultra-smooth for guests or a special spread.
Start with room-temperature chickpeas. Keep aquafaba nearby and drizzle slowly to fine-tune thickness. That trick lets you minimize oil without losing silkiness.
- Plan on about 5–10 minutes of active time for a basic batch.
- Pulse to break up solids; then blend until velvety.
- If you want more ideas for wraps and pairings, try this turmeric falafel wrap recipe: turmeric falafel wrap.
Step-by-Step: How to Make Hummus Without Tahini
Start at the cutting board: a quick mince of garlic sets the tone. Add the garlic to the bowl of the food processor and pulse until very fine so it distributes without sharp chunks.
Drain the can of chickpeas over a measuring cup to catch the aquafaba. Add chickpeas to the processor and blend until the paste is ultra-smooth. This is the texture step — don’t rush it.
- Sprinkle in kosher salt and squeeze in fresh lemon juice. Process to combine flavors.
- With the processor running, drizzle aquafaba slowly until the mix loosens into a glossy ribbon. Add a teaspoon at a time to control thickness.
- If using olive oil, stream in a little at the end to finish the emulsion and add gentle richness.
Taste and tweak: a pinch more salt, another squeeze of juice, or a whisper of cumin can wake the bowl. If you drained the liquid, swap a few tablespoons of broth. Too thin? Stir in a spoonful of plain Greek yogurt or a few extra chickpeas.
| Issue | Quick Fix | Time Impact |
|---|---|---|
| Grainy texture | Process longer; scrape bowl | 2–3 minutes |
| Too thin | Add chickpeas or yogurt | 1 minute |
| No aquafaba | Use vegetable broth (2–3 tablespoons) | 30 seconds |
Total minutes: just a handful. Follow this flow, and you can make a hummus recipe confidently every time.
Texture Tips and Troubleshooting
A few smart fixes will get your dip to the silky stage fast. I keep troubleshooting simple and repeatable so each batch improves.
Below are precise, tested fixes that I use when mine comes out too thick, thin, or grainy. They are practical and fast.
Quick Fixes that Work
- Too thick: drizzle aquafaba slowly while blending until soft peaks hold. This adds liquid without extra oil or fat.
- Too thin: pulse in extra chickpeas or one spoon of plain Greek yogurt to rebuild body. It firms without greasiness.
- Grainy: process longer and scrape the bowl. Next time, peel skins or blend chickpeas alone before adding liquids.
- Flat or sharp: add a pinch of salt and a squeeze more lemon to brighten flavors. Harsh garlic? Blend longer or use roasted garlic.
Smart Liquid Swaps
Accidentally drained the can? Use vegetable or chicken broth, adding a tablespoon at a time until scoopable. After chilling, stir if the mix weeps; the emulsion comes back with a quick whisk.
| Issue | Fast Fix | Time |
|---|---|---|
| Too thick | Drizzle aquafaba 1 tsp at a time while blending | 30–90 seconds |
| Too thin | Pulse in 2–3 extra chickpeas or 1 tbsp Greek yogurt | 30–60 seconds |
| Grainy texture | Process 2–4 minutes longer; peel skins next time | 2–4 minutes |
| No can liquid | Replace with warm vegetable or chicken broth, and add slowly | 30–60 seconds |
Variations to Try After the Base Recipe
A simple mash of roasted veg or avocado instantly gives the base a new personality. I keep the core lemon, garlic, and cumin in place, then add one standout ingredient so the flavor stays balanced.
Roasted Red Pepper, Avocado, and Beet Twists
Roasted red pepper: stir in about 1/3 cup for sweetness and color. Finish with a dusting of paprika.
Avocado: Blend one ripe avocado for ultra-silk. Brighten with lemon and cilantro.
Beet: roast and pulse one small beet for earthiness and a magenta hue. A squeeze of lemon keeps it lively.
Spice It Up and Herb-Forward Blends
Add a pinch of cayenne or red pepper flakes for heat. Smoky paprika deepens flavor without masking the base.
Try parsley for freshness, cilantro for zip, or dill for a cool aroma. I add herbs to taste.
Oil-Free and Extra-Savor Options
To go oil-free, trust aquafaba and process longer for silkiness. For a savory boost, stir in 1–2 teaspoons of nutritional yeast.
| Add-in | Amount | Flavor | Finish |
|---|---|---|---|
| Roasted red pepper | 1/3 cup | Sweet, smoky | Paprika sprinkle |
| Avocado | 1 ripe | Creamy, mild | Lemon & cilantro |
| Roasted beet | 1 small | Earthy, sweet | Extra lemon |
| Spice/herbs | Pinch or to taste | Warm or fresh | Cumin or parsley |
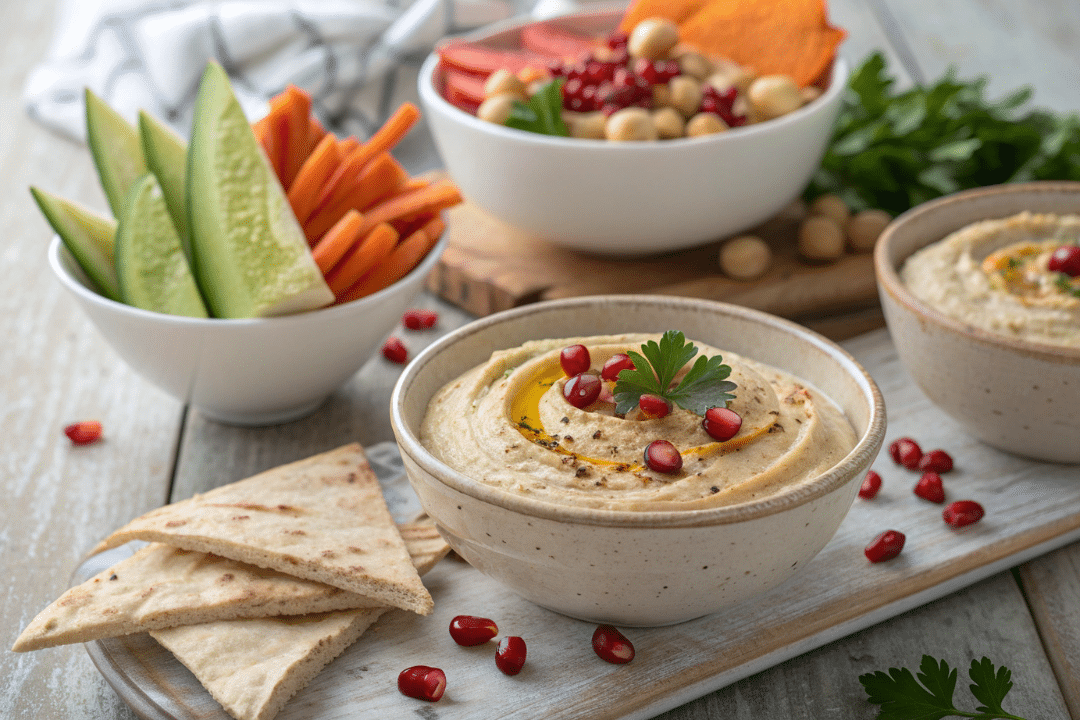
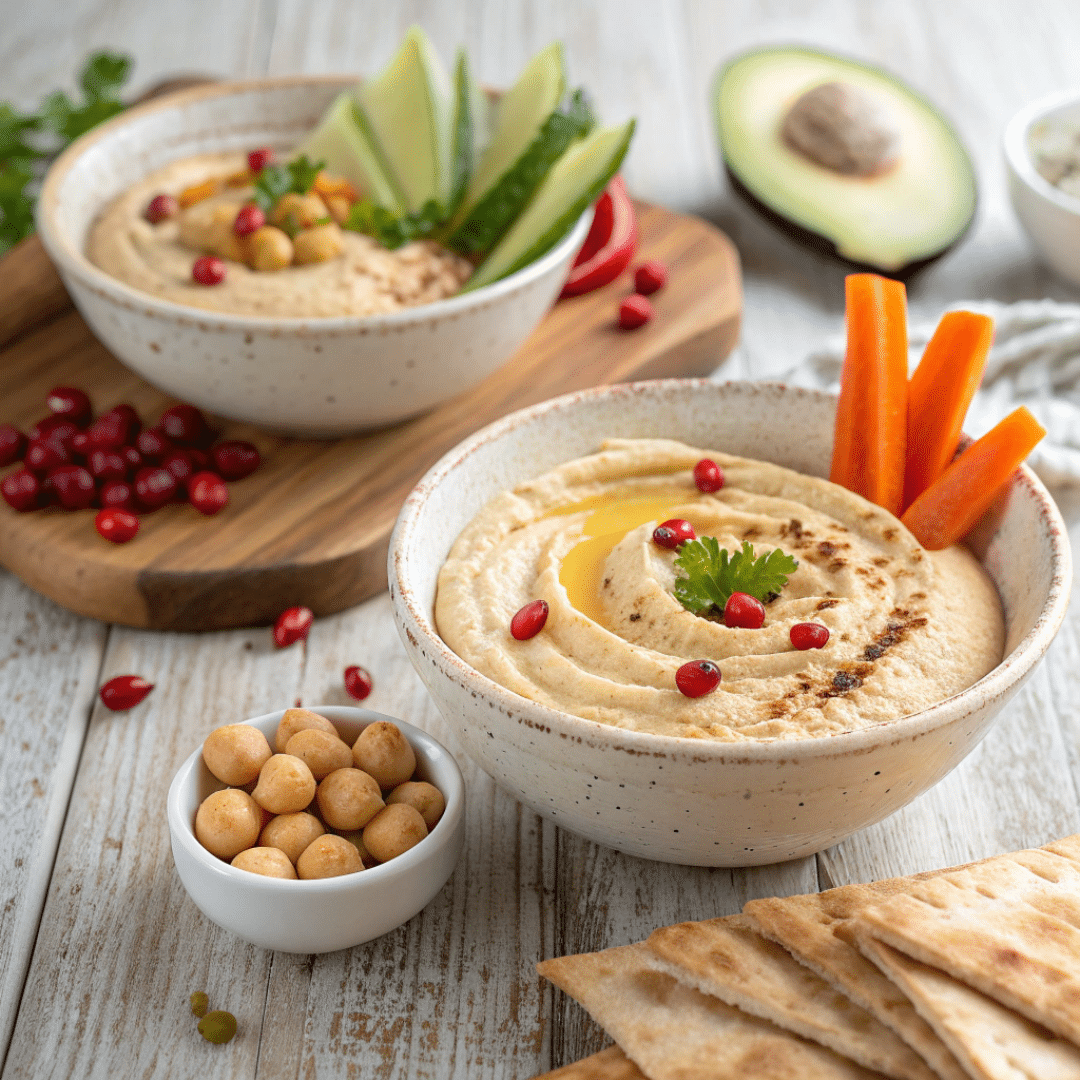
Serving Ideas: Dips, Spreads, and Sides
A single bowl can tie together warm pita, crunchy chips, and fresh vegetables. I like to arrange textures so every bite hits crisp, creamy, and bright.
What to Dip
Set out warm pita and sturdy crackers for scooping. Add pita chips for extra crunch.
Raw veg work wonders: cucumber spears, carrot sticks, bell pepper strips, cherry tomatoes, and lightly blanched green beans all sing with the dip.
Mediterranean-Inspired Sides
Build a mezze board with olives, chopped salad, roasted veg, and grilled halloumi. The spread anchors the plate with a bright, tangy flavor.
Spoon it beside kebabs, tabbouleh, or bulgur salad to add creaminess to every bite.
Sandwiches and Wraps
Spread a thick layer in wraps with cucumbers, greens, and pickled onions for lunch. Swap mayo for the same spread in sandwiches for a richer, better-for-you body.
- Finish toasts with lemon zest, oil, and flaky salt.
- Thin with aquafaba and lemon to make a silky dressing for grain bowls.
- Garnish with paprika or sumac and parsley before serving.
| Pairing | Texture | Why it works |
|---|---|---|
| Warm pita | Soft, warm | Scoops and soaks up flavor |
| Crackers & pita chips | Crisp | In contrast to a creamy bowl |
| Fresh veg | Crunchy, juicy | Refreshes palate between bites |
| Mediterranean sides | Varied | Creates a balanced mezze spread |
For a seasonal twist, try my maple carrot variation for a sweeter edge: maple carrot spread. Keep portions generous—people always come back for another scoop.
Storage, Meal Prep, and Food Safety
A well-stored bowl can be the week’s best snack—if you treat it right. Proper storage keeps flavor and texture bright and limits waste. I always move my dip to an airtight container as soon as it cools.
How to Store for Best Texture
Smooth the top before sealing. That reduces air exposure and prevents a dry film. Label the container with the date so you know the exact days of freshness.
Chilled vs. Room Temperature: Timing and Safety
Refrigerate promptly. I plan to finish a batch within 3–5 days for peak flavor and safety. Before serving leftovers, stir to recombine any separated liquid.
I like my spread slightly chilled or at room temp for 20–30 minutes. Don’t leave it out more than a couple of hours; at that time bacteria risk rises and texture loosens.
- Portion into small cups for grab-and-go snacks with veggies or pita chips.
- For parties, scoop into a serving bowl and keep the rest chilled.
- If transporting, pack cold with an ice pack and keep covered until serving.
| Storage Method | Refrigerator Time | Best Serve Temp | Notes |
|---|---|---|---|
| Airtight jar | 3–5 days | Chilled or 20–30 min at room temp | Smooth top; label date |
| Portioned cups | 3 days | Chilled | Great for meal prep and grab-and-go |
| Serving bowl (fresh) | Keep rest refrigerated | Room temp ideal for short time | Refill from chilled container to keep quality |
Nutrition and Cost Notes
You don’t need to skimp on flavor to lower the fat in a favorite spread. I trim calories by swapping or cutting high-calorie ingredients while keeping the mouthfeel I love.
Lower-Fat Options Without Sacrificing Flavor
Cutting tahini and leaning on aquafaba drops overall fat while preserving a creamy texture. A small splash of olive oil adds polish without pushing calories too high. Chickpeas deliver protein and fiber, so each scoop fills you up.
Budget-Friendly Swaps and Pantry-First Strategy
Homemade recipes beat store-bought tubs in cost. Tahini is one of the pricier inputs; skipping it stretches your dollars. Buying garbanzo beans by the case and lemons in bulk saves more.
- I season boldly with lemon juice, cumin, and salt so the lighter profile never tastes flat.
- This base is vegan and can be oil-free, which makes meal planning easier.
- Small batch math: homemade often costs far less per serving than traditional hummus from a jar.
| Item | Calories per 2 tbsp | Key nutrient | Cost per cup |
|---|---|---|---|
| Standard (with tahini & oil) | 120–140 | Fat | $0.80 |
| My version (aquafaba, little oil) | 70–90 | Protein & fiber | $0.40 |
| Oil-free base | 50–70 | Fiber | $0.35 |
| Store-bought jar | 140–180 | Fat | $1.50+ |
Conclusion
A few smart steps in your food processor yield a silky, bright bowl every time. Aquafaba gives creaminess fast, so you can make this hummus recipe in about 5–10 minutes without tahini.
Start with chickpeas, lemon juice, garlic, and good salt. Taste as you go. Drizzle olive oil at the end if you want extra sheen. Finish with cumin and a dusting of paprika or sumac for color.
Store leftovers in an airtight container for 3–5 days and stir before serving. Serve as a dip with pita, crackers, or fresh veg, or spoon it onto sides for added protein.
Ready to make the recipe again? Pulse garlic, puree the beans, add liquid, season, and enjoy—no sesame required.
Tahini-Free Hummus
Ingredients
Method
- Mince garlic and pulse in food processor until very fine
- Add drained chickpeas and blend until smooth
- Sprinkle in salt, cumin, smoked paprika, and squeeze in lemon juice; pulse to combine
- With processor running, drizzle aquafaba slowly until hummus reaches a silky, scoopable texture
- If using olive oil, stream in a little at the end to finish the emulsion
- Taste and adjust seasoning: more salt, lemon, or cumin as needed
- For variations, fold in roasted red pepper, avocado, or beet and blend until combined
- Transfer to serving bowl and garnish with paprika, herbs, or a drizzle of olive oil
Notes
FAQ
What can I use instead of tahini and still get a creamy dip?
How much aquafaba or olive oil should I add?
Do I need a food processor, or can I use a blender?
Should I rinse canned chickpeas before blending?
How do I fix dip that’s too thick or too grainy?
Can I make this ahead and how long does it keep?
What garlic approach gives the best flavor?
How can I keep the dip lower in fat without losing flavor?
Are there good flavor variations to try after mastering the base?
What should I serve with this dip for a crowd?
About The Author
John
John Watson is the passionate food enthusiast behind MePlusFood.com. With a deep love for exploring culinary delights, he shares honest restaurant reviews, mouthwatering recipes, and culinary adventures. Join John on his flavorful journey to savor the world one bite at a time.