Crispy Chicken Katsu with Tonkatsu Sauce
Jump to Recipe
Chicken katsu is a Japanese-style cutlet with a crust that stays crisp long after it comes out of the oil. The secret is panko, which creates an open, airy coating rather than a dense shell.
Pounding the chicken to an even 1 cm thickness matters more than most people expect. Uneven pieces cook unevenly, and you end up with dry edges and an underdone center.
The tonkatsu sauce is sweet, tangy, and just slightly smoky — built from Worcestershire, ketchup, soy sauce, oyster sauce, and a little mustard, borrowing the same bold umami logic as a miso glazed black cod. No specialty store required.
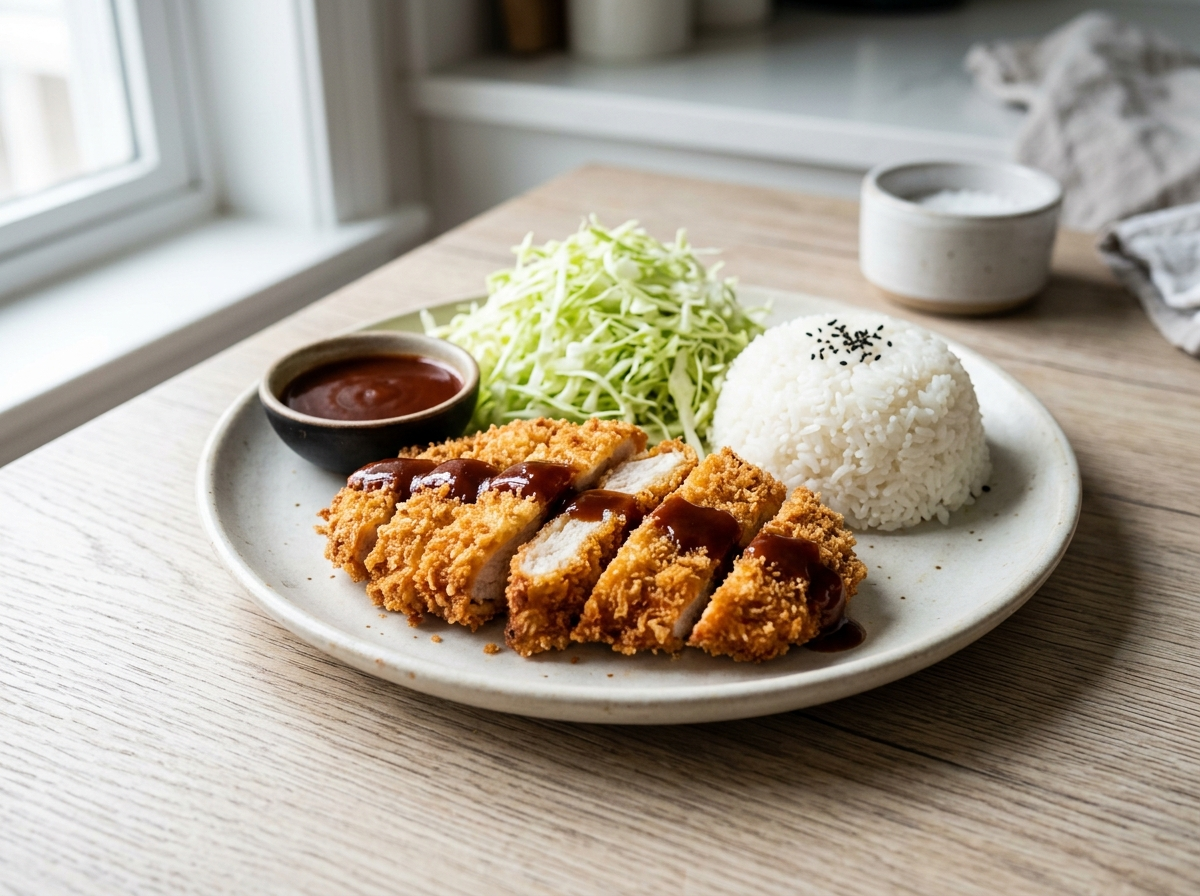
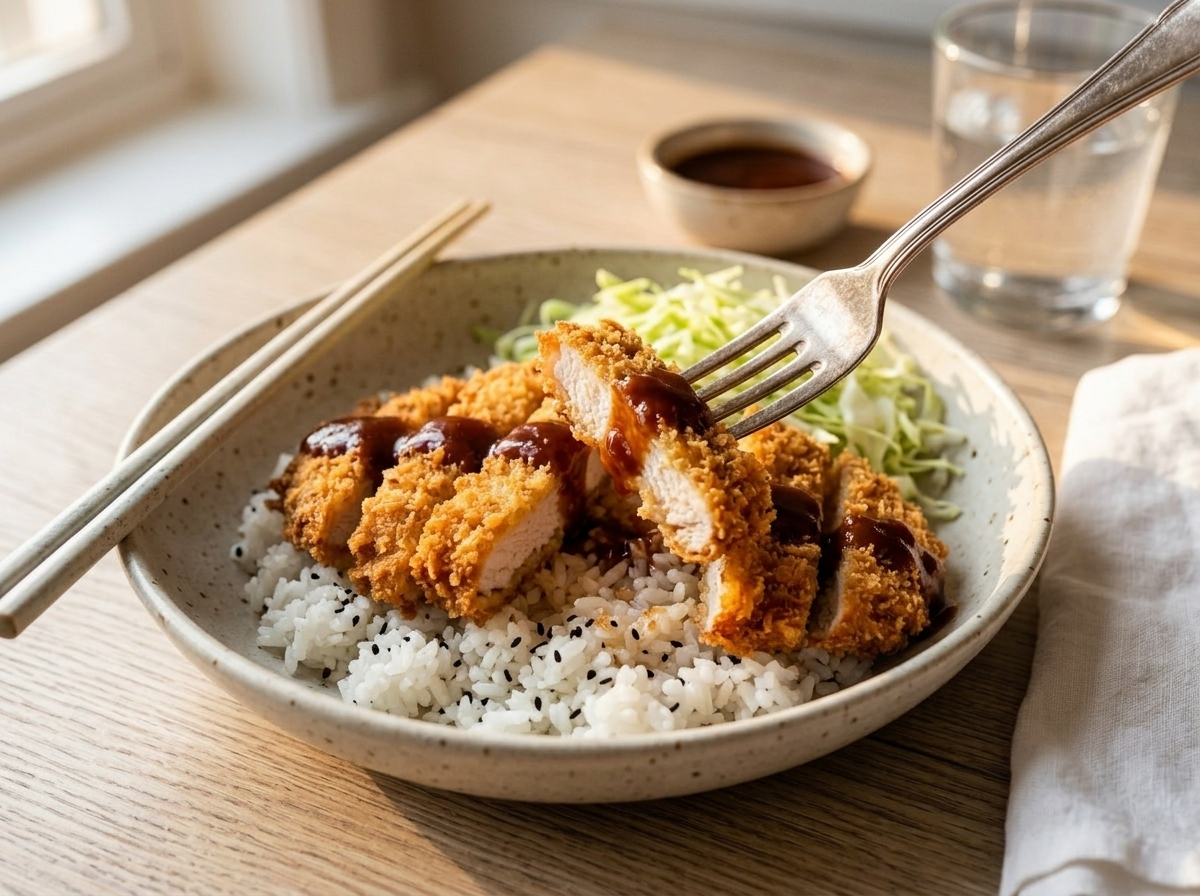
This comes together in about 40 minutes and works on a weeknight without much fuss. Serve it over steamed rice with shredded cabbage and the whole plate feels complete.
Why You’ll Love This Recipe
- Crust stays crisp for at least 20 minutes after frying
- Tonkatsu sauce uses only pantry ingredients
- Pounded chicken cooks through in under 8 minutes
- Works over rice or tucked into a sandwich roll
Ingredient Notes
- chicken breast: Boneless, skinless breast works best here. Pound each piece to about 1 cm even thickness so the crust and meat finish at the same time. Chicken thigh also works and stays juicier.
- panko breadcrumbs: Panko is coarser than regular breadcrumbs, which is what gives katsu its open, crunchy crust. Standard fine breadcrumbs will produce a denser, less crisp coating.
- all-purpose flour: The flour layer is the adhesive base. Shake off the excess before dipping in egg or the coating will clump. For a gluten-free version, rice flour works well.
- eggs: Two large eggs whisked with a tablespoon of water gives enough binding for four cutlets. Don’t skip the water, it thins the egg slightly and helps the panko adhere more evenly.
- neutral oil: Use vegetable, canola, or sunflower oil. You need about 1.5 cm depth in the pan for shallow frying. Olive oil’s smoke point is too low for this temperature.
- Worcestershire sauce: This is the backbone of the tonkatsu sauce and provides the umami depth. If you need a fish-free option, use soy sauce-based Worcestershire or coconut aminos with a drop of tamarind.
- oyster sauce: Adds a thick, savory sweetness to the tonkatsu sauce. Hoisin sauce is the closest substitute. For a fully vegetarian sauce, use mushroom-based oyster sauce.
- Dijon mustard: Just half a teaspoon cuts through the sweetness in the tonkatsu sauce and adds a mild sharpness. Yellow mustard can substitute in the same quantity.
Crispy Chicken Katsu with Tonkatsu Sauce
Ingredients
Method
- Combine Worcestershire sauce, ketchup, soy sauce, oyster sauce, Dijon mustard, and sugar in a small bowl. Whisk until the sugar dissolves and the sauce is smooth. Taste and adjust with a little more ketchup if you want it sweeter. Set aside.
- Place each chicken breast between two sheets of plastic wrap or in a zip-lock bag. Pound with a meat mallet or the flat base of a heavy pan until the thickness is an even 1 cm throughout.
- Season both sides of each breast with salt and black pepper.
- Set up a breading station: flour in the first shallow dish, whisked egg mixture in the second, and panko breadcrumbs spread in the third.
- Working with one piece at a time, dredge the chicken in flour and shake off any excess so only a thin, even layer remains.
- Dip the floured chicken into the egg mixture, letting the excess drip off.
- Press the chicken firmly into the panko on both sides, patting with your palm so the breadcrumbs adhere in a compact, even layer. Place the coated cutlet on a wire rack and repeat with the remaining pieces.
- Let the coated cutlets rest on the rack for 2 minutes before frying.
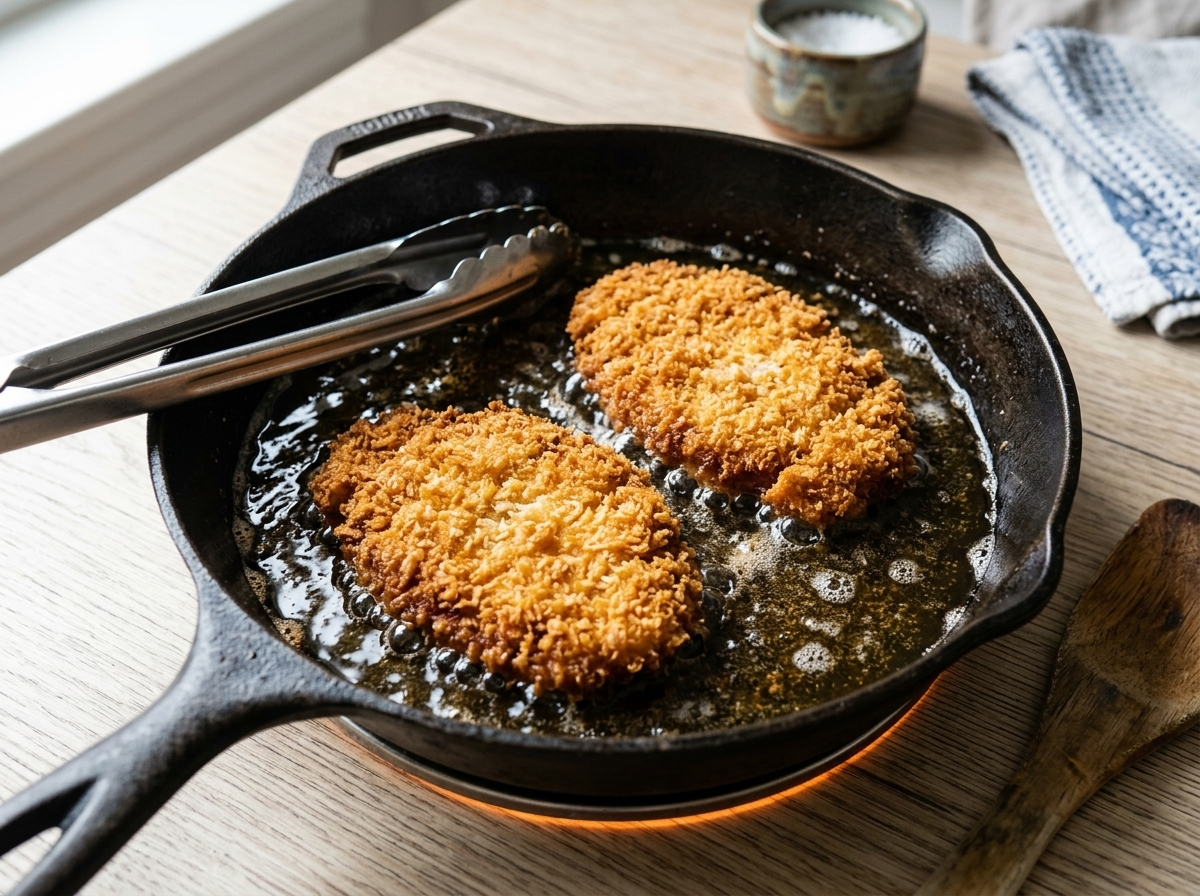
- Pour oil into a large, heavy-bottomed skillet to a depth of about 1.5 cm. Heat over medium-high until an instant-read thermometer reads 175 C / 345 F.
- Carefully lower two cutlets into the oil. Fry for 3 to 4 minutes on the first side until deep golden brown, then flip and fry for 3 to 4 minutes more until the second side matches and the chicken is cooked through to 74 C / 165 F internal temperature.
- Transfer the cooked cutlets to a clean wire rack set over a sheet pan. Do not stack them. Fry the remaining two cutlets, checking that the oil temperature returns to 175 C before adding them.
- Slice each katsu crosswise on the diagonal into 2 cm strips. Arrange over steamed rice with shredded cabbage alongside. Spoon or pour tonkatsu sauce over the cutlet just before serving.
Notes
Tips for Success
- Pound chicken breasts to exactly 1 cm using a meat mallet or heavy pan for even, fast frying.
- Set up the flour, egg, and panko in three separate shallow dishes before you start coating.
- Press panko firmly onto both sides of the egg-coated chicken so the crust doesn’t slide off in the oil.
- Keep oil temperature between 170 C and 180 C for a crust that browns without absorbing excess oil.
- Rest fried cutlets on a wire rack, not paper towels, so steam escapes and the bottom stays crisp — the same technique behind crispy pork schnitzel’s shatteringly crisp crust.
Variations
- Tofu katsu: slice firm tofu 2 cm thick, press dry, then coat and fry the same way for a vegetarian plate.
- Katsu sando: tuck sliced chicken katsu into soft white bread with shredded cabbage and extra tonkatsu sauce.
- Cheese katsu: place a slice of melting cheese on the cutlet in the final 30 seconds of frying, then fold edges.
Storage and Reheating
Cooked chicken katsu keeps in the fridge for up to 3 days in an airtight container. Store the tonkatsu sauce separately in a small jar for up to 2 weeks.
To reheat and restore crunch, place cutlets on a wire rack over a sheet pan and bake at 200 C / 390 F for 8 to 10 minutes. Microwaving works if you’re in a hurry but the crust will soften.
For freezing, freeze cooked cutlets flat on a sheet pan until solid, then transfer to a zip bag. They keep for up to 2 months. Reheat straight from frozen at 200 C for 14 to 16 minutes.
Serving Suggestions
The most straightforward plate is katsu over steamed short-grain rice with a pile of finely shredded raw cabbage alongside. The cabbage cuts through the richness and the tonkatsu sauce does double duty as dressing for both.
For a fuller Japanese-style meal, add a bowl of miso soup — the kind of deep, fermented depth you also get from black garlic ramen with soft egg — and a small dish of pickled cucumber. The contrast between the hot, crisp cutlet and the cold, vinegary pickle is the whole point of the plate.
Leftover katsu makes a strong lunch the next day sliced cold over rice with a drizzle of the sauce. It also works layered into a sandwich with shredded cabbage and a thin spread of Japanese mayo.
FAQ
Why is my chicken katsu crust falling off during frying?
The most common cause is skipping the flour layer or not shaking off the excess before dipping in egg. The flour gives the egg something to grip. Pressing the panko firmly onto the egg-coated surface before frying also helps the crust bond during cooking.
Can I use chicken thighs instead of breast for katsu?
Yes, boneless skinless thighs work well and stay juicier than breast meat. Pound them to an even 1 cm thickness and trim any large pockets of fat so the coating lies flat.
Can I make chicken katsu in an air fryer instead of shallow frying?
You can. Spray the coated cutlets well with oil on both sides and air fry at 200 C for 10 to 12 minutes, flipping halfway. The crust won’t be as deeply golden or as shatteringly crisp as the pan-fried version, but it’s a solid lighter option.
How do I know when the oil is hot enough to fry the katsu?
Drop a few panko crumbs into the oil. They should sizzle immediately and float to the surface within 2 to 3 seconds. An instant-read thermometer showing 175 C is the most reliable check.
Is homemade tonkatsu sauce different from the bottled version like Bull-Dog?
The flavor profile is similar but homemade tends to be a little thicker and less sweet than Bull-Dog brand. You can adjust the balance by adding more Worcestershire for depth or a touch more ketchup if you prefer it sweeter.
Is chicken katsu gluten-free?
Standard chicken katsu is not gluten-free because of the all-purpose flour and panko coating, plus Worcestershire sauce in the tonkatsu sauce often contains gluten. To make it gluten-free, swap the flour for rice flour, use gluten-free panko, and check that all sauce ingredients are labeled gluten-free.
About The Author
John
John Watson is the passionate food enthusiast behind MePlusFood.com. With a deep love for exploring culinary delights, he shares honest restaurant reviews, mouthwatering recipes, and culinary adventures. Join John on his flavorful journey to savor the world one bite at a time.